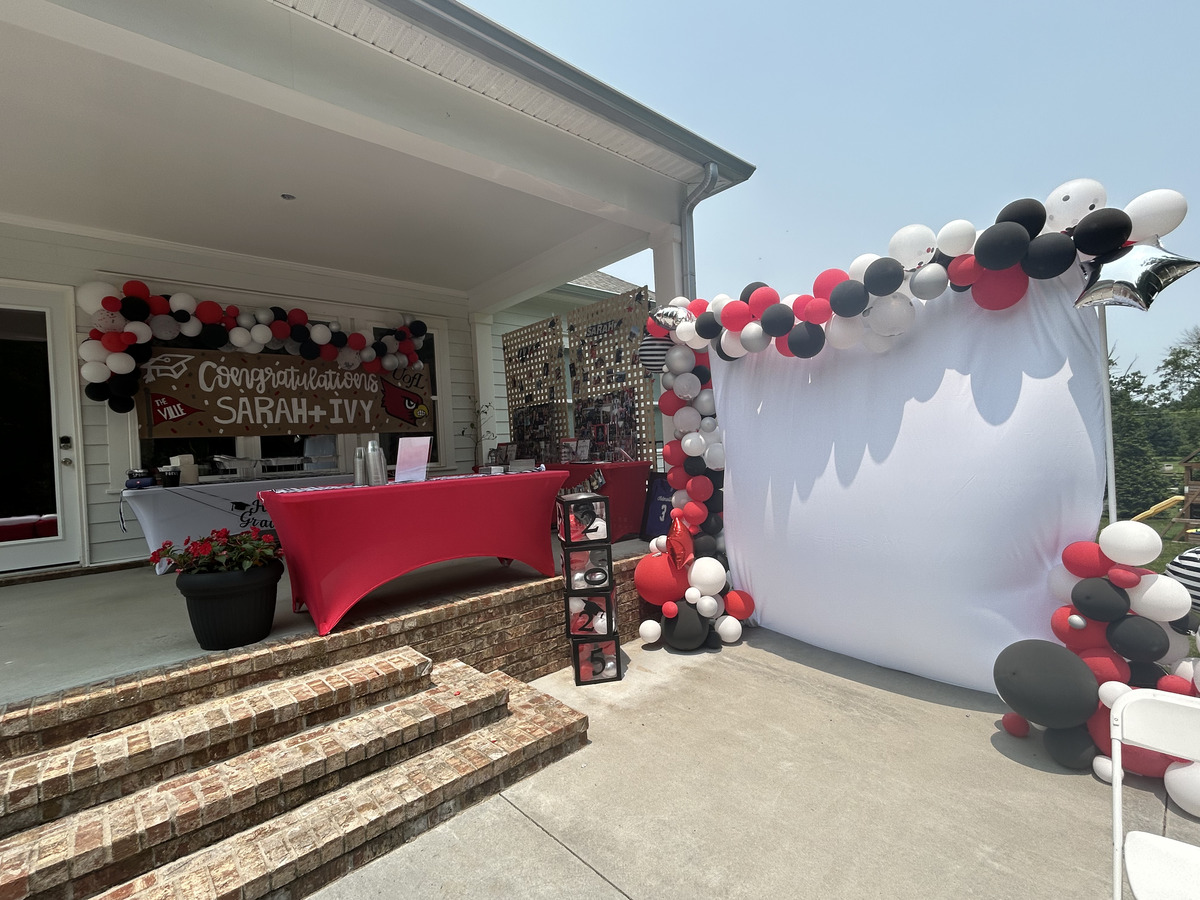
There is a specific kind of panic that sets in around April of senior year. You realize the invitation needs to go out, the date needs to land before every other graduate in town claims the same Saturday, and suddenly you're ordering balloon arches on Amazon at 11 p.m. in a tab next to one called "how to make a photo wall with a lattice panel."
I've hosted plenty of parties — corporate dinners, baby showers, Super Bowls with enough chili to feed a church — but there's nothing quite like putting together a graduation party for a kid who is, in fact, about to leave. Every little detail suddenly means something. As a bonus stepmom, I wanted this day to feel like the whole family showed up for Sarah — and when we decided to throw a joint party for her and her best friend Ivy, I went full DIY because (1) I wanted it to feel personal, and (2) I am constitutionally incapable of paying someone else to arrange my flowers.
Almost every piece of decor in this post came from Amazon (the two exceptions — fresh flowers from the grocery store and the lattice panels from Home Depot — are called out below). Linking it now will save you three evenings of scrolling.
Here is how it came together — the wins, the printables, the shortcuts, and the one thing I'd absolutely do again.
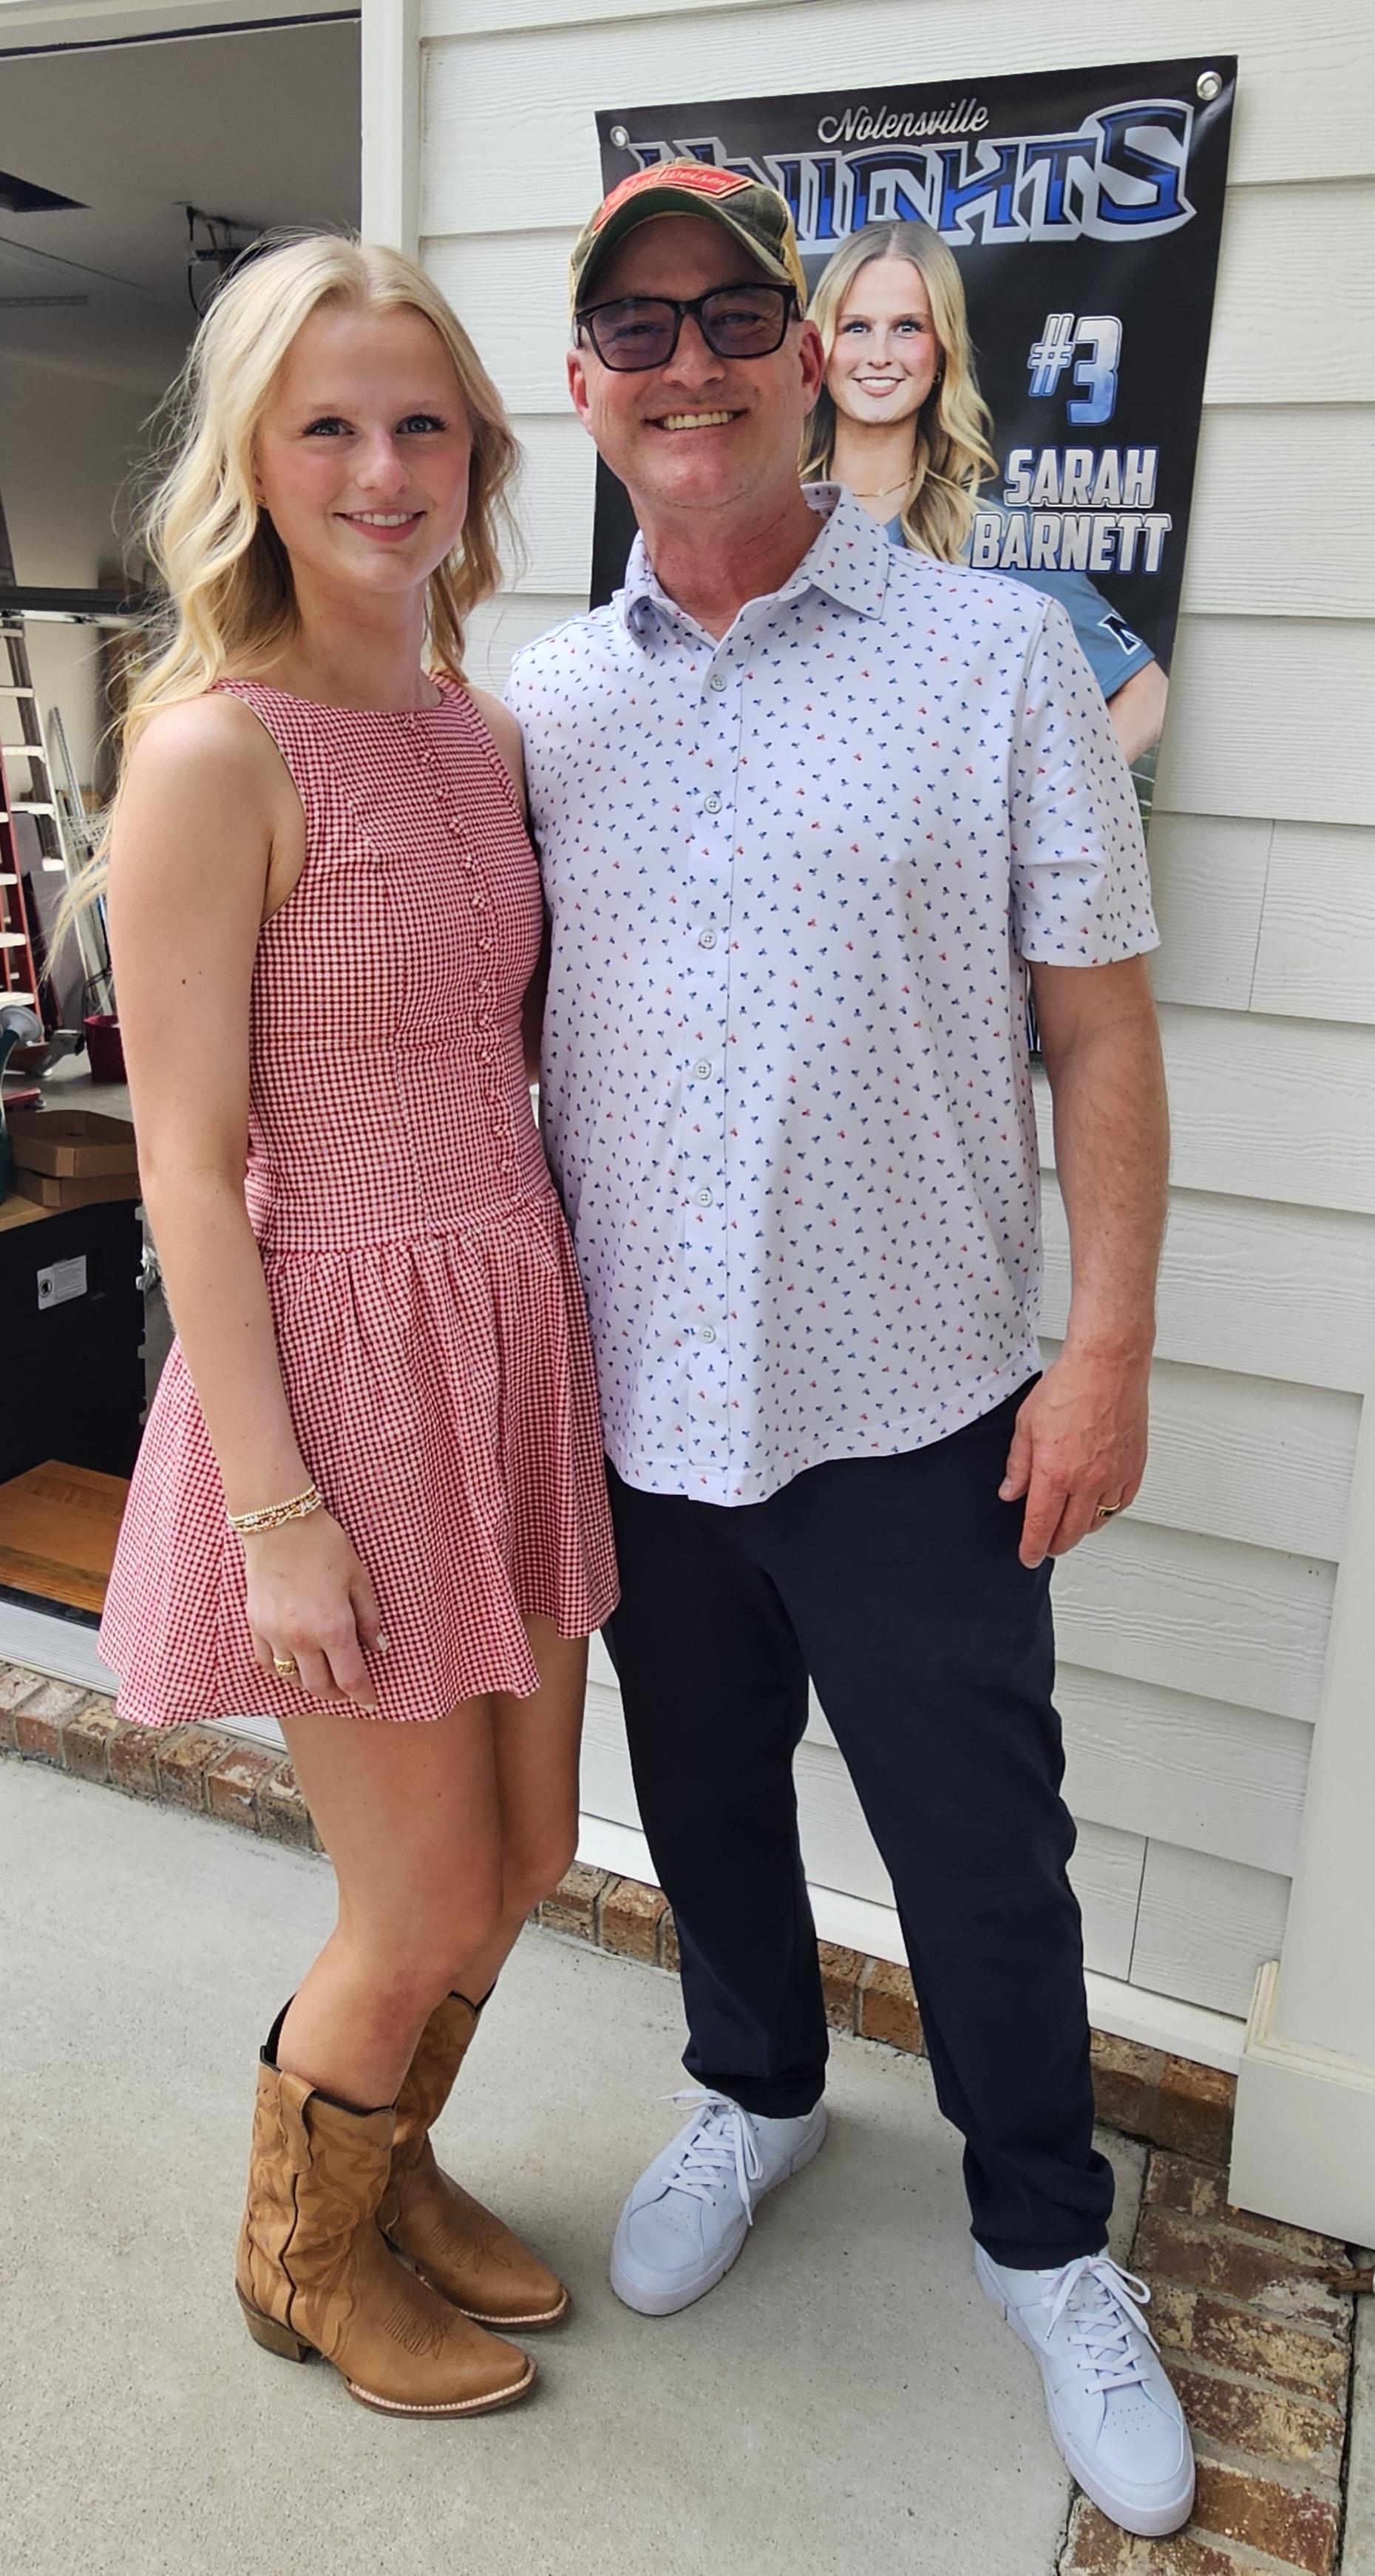
1. Start with the colors, not the Pinterest board
The single best decision we made was to anchor everything to two palettes and stop scrolling. We used Nolensville Knights navy and silver for anything honoring her high school years, and University of Louisville Cardinals red and black for anything pointing forward to college. Because Ivy is also Louisville-bound, red, black, and white did double duty as the main party palette, and navy accents showed up on photo displays and memorabilia.
Once the colors were locked, every decision got faster — scrapbook paper, ribbon, tablecloths, balloons, signage — all pulled from the same three-color family.
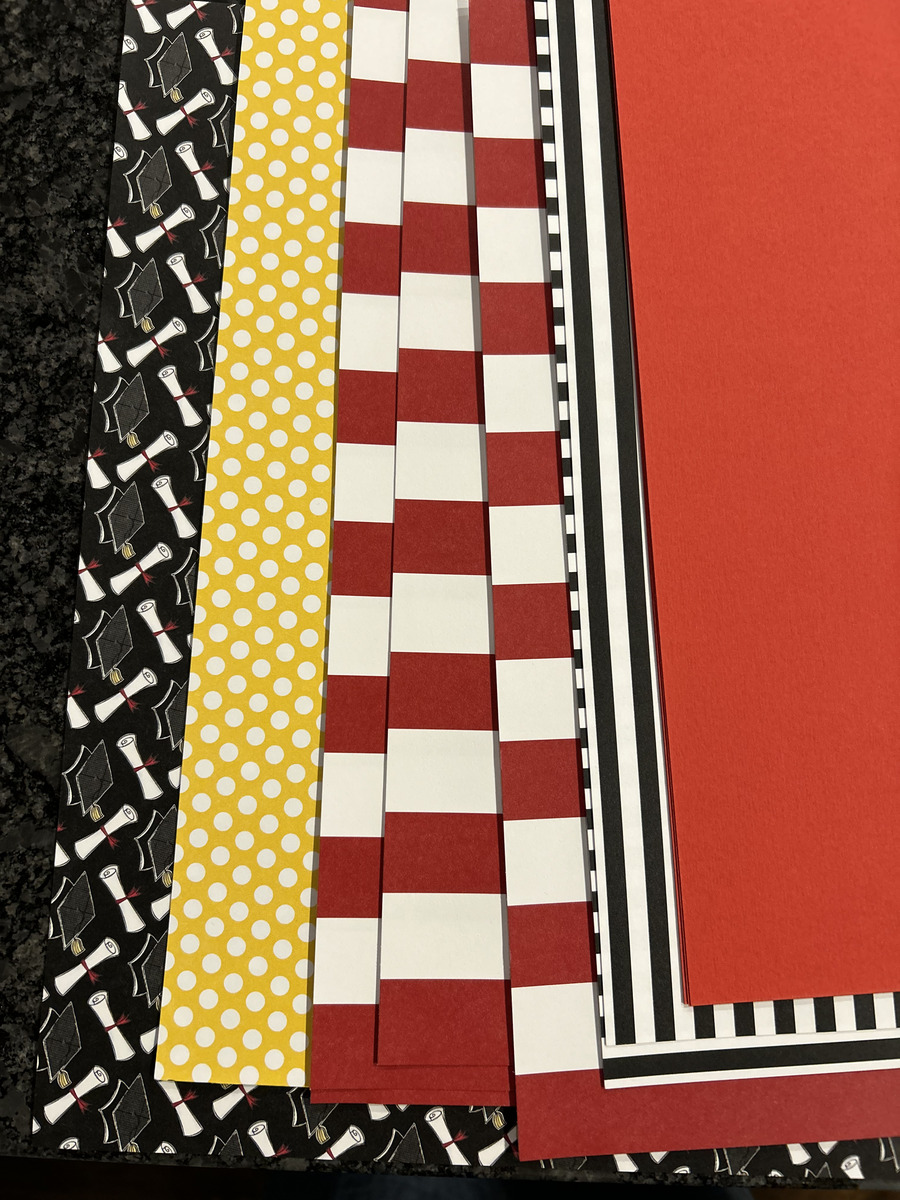
Patterned scrapbook paper is the single cheapest design trick I know. A stack of 12x12 sheets for under $20 made every printed sign look ten times more intentional.
2. The showstopper: a DIY balloon garland
I will not pretend this was my favorite afternoon of the year. It was hot, it was slow, and I ran out of the little plastic strip about halfway through. But a DIY balloon garland is genuinely the best per-dollar decor investment you can make for a graduation party.
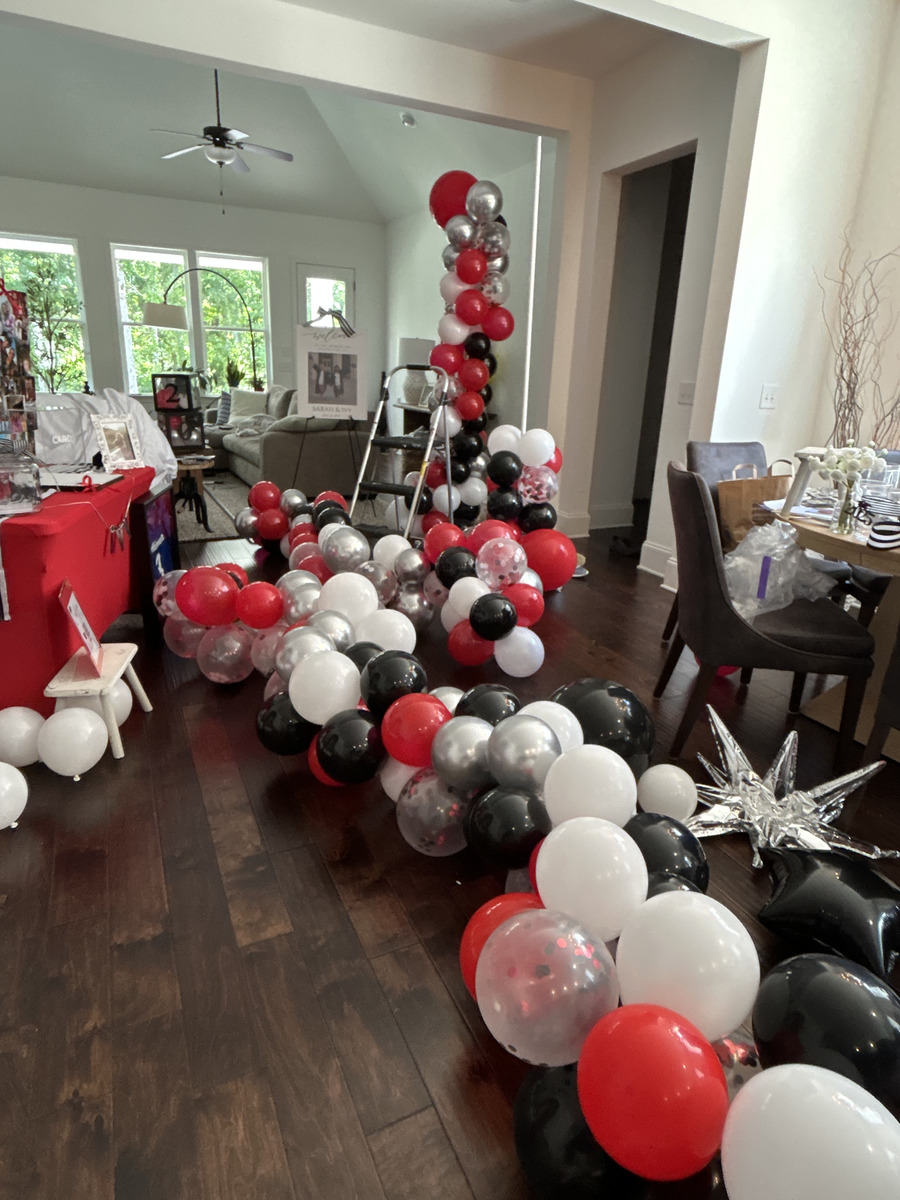
What I used
- A balloon arch kit from Amazon (~$15) — comes with the plastic strip, dots, and a hand pump
- Three packs of balloons in red, black, white, silver chrome, and clear-confetti (about $40 total)
- A few large foil "burst" accents for visual weight
- Command hooks to anchor each end
The hacks that saved me
- Pre-inflate the night before. Do not try to do this the morning of. I built the entire garland on the floor of the living room the evening before and hung it in about 20 minutes the next day.
- Vary the sizes. Mix 5-inch, 11-inch, and a few 16-inch balloons. It's the size contrast — not the color mix — that makes a garland look professional.
- Stuff it thick at the focal points. At the top corners of the photo booth backdrop, I quadrupled up. Nobody photographs the middle stretch; they photograph the ends.
3. DIY lattice photo boards (the thing every guest noticed)
This was my favorite project of the whole party and the thing people kept asking about. For each graduate, we built a wood lattice photo display — a 4x6 foot pre-made garden lattice panel from the home improvement store, about $22 each.
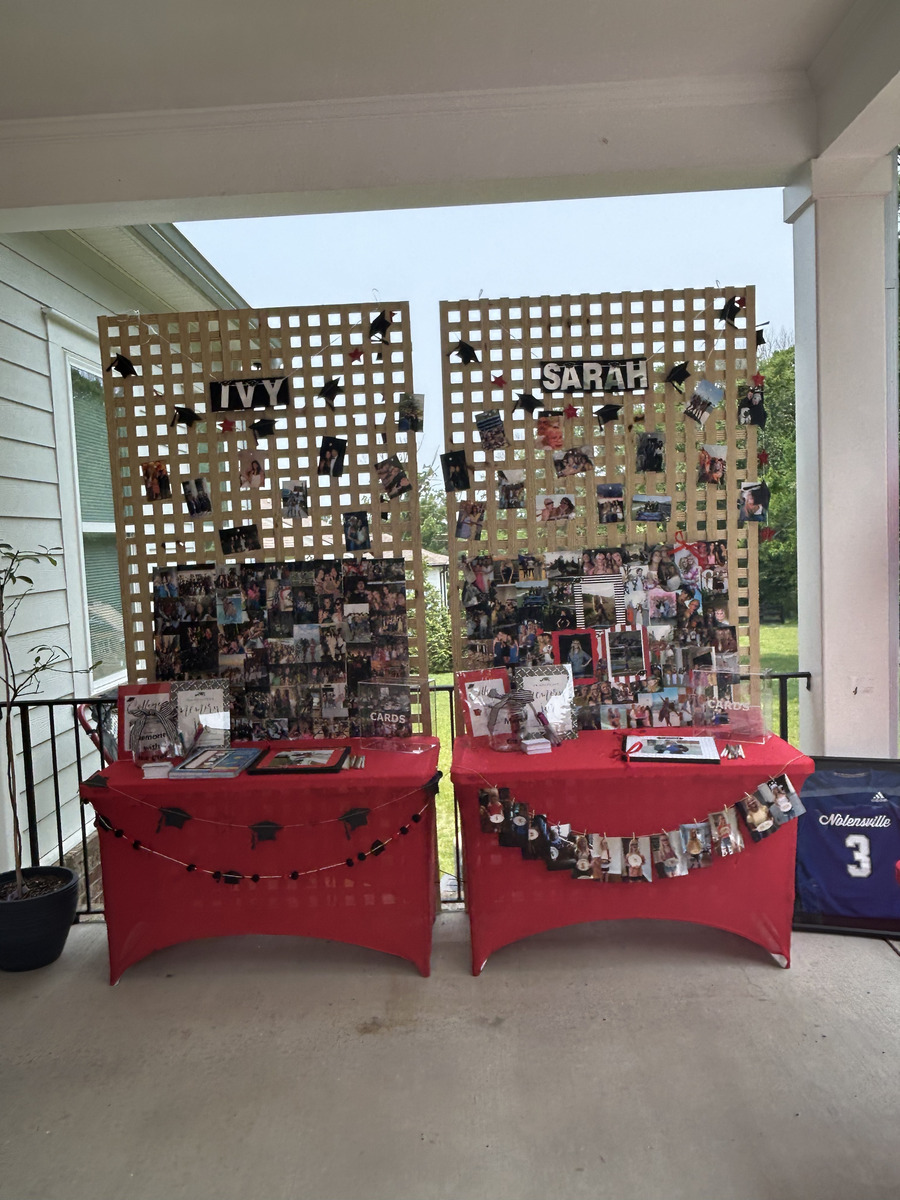
We leaned them against the back porch railing and dressed each table underneath with:
- A red spandex tablecloth (reusable — I already own two from previous parties)
- A black-and-white striped garland across the front
- Mini graduation cap confetti clipped in with tiny clothespins
- A "CARDS" box, a framed photo, and the memory jar
How to build one
- Buy a 4x6 wood or vinyl lattice panel from the garden section. Spray paint is optional.
- Print photos — a mix of baby pictures, sports moments, friend group pics, and senior portraits. I used a drugstore app and did 4x6s for about $0.33 each.
- Clip them on with mini clothespins (Dollar Tree has them).
- Add a name banner across the top. I used craft store chipboard letters backed with patterned paper.
Each board ended up being a mini timeline of that graduate's life, and it was where the grandparents and aunts camped out for most of the party.
4. Mason jar florals with a graduation cap twist
If you want florals that look bespoke but cost under $15 a piece, here's the formula:
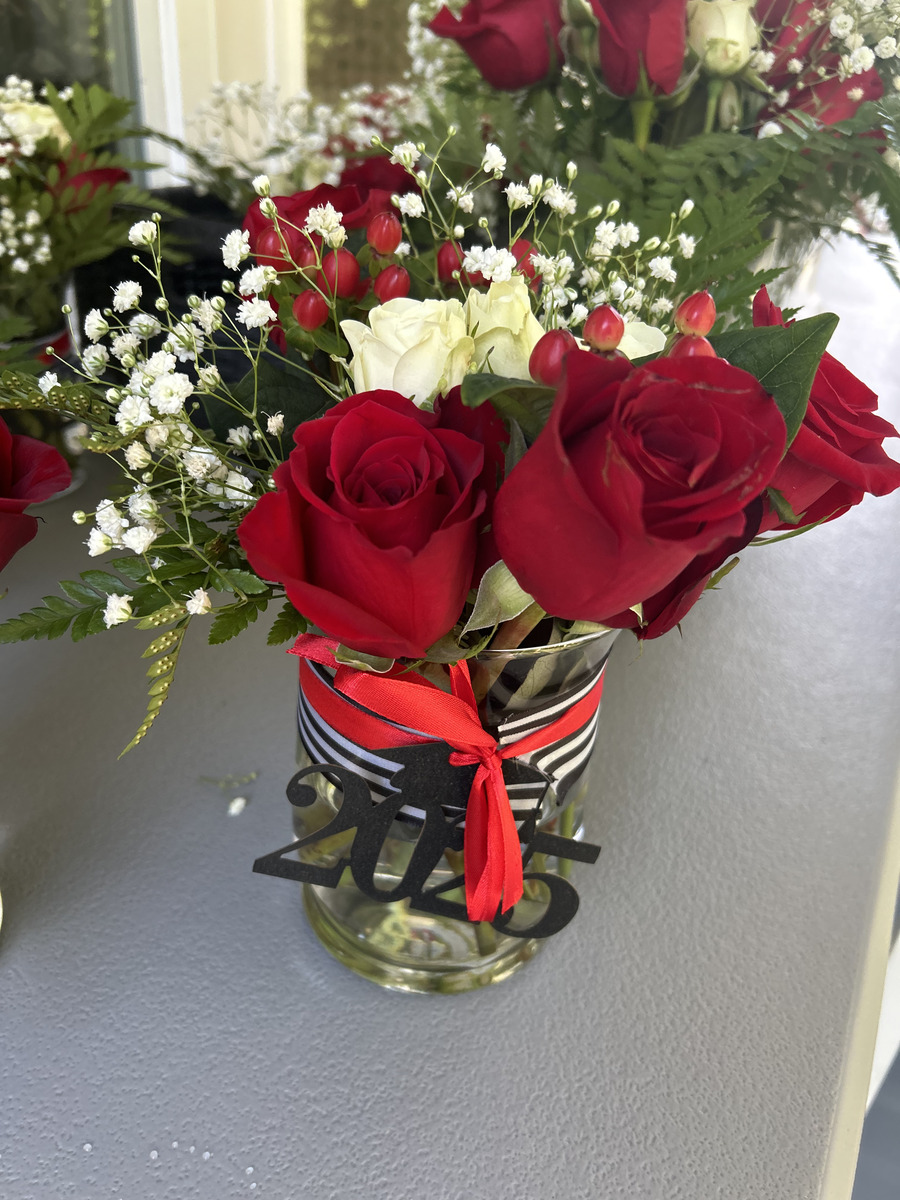
The vessel + dressing
- Wide-mouth mason jars (we already had them)
- Black-and-white striped grosgrain ribbon, tied in a small bow
- A black "2025" cutout from the craft store, threaded onto the ribbon
The flowers (grocery store)
- 3–4 stems of red roses
- 2–3 stems of white spray roses
- 1 bunch of baby's breath
- A few stems of hypericum (the little red berries make it look expensive)
- Leatherleaf fern for greenery
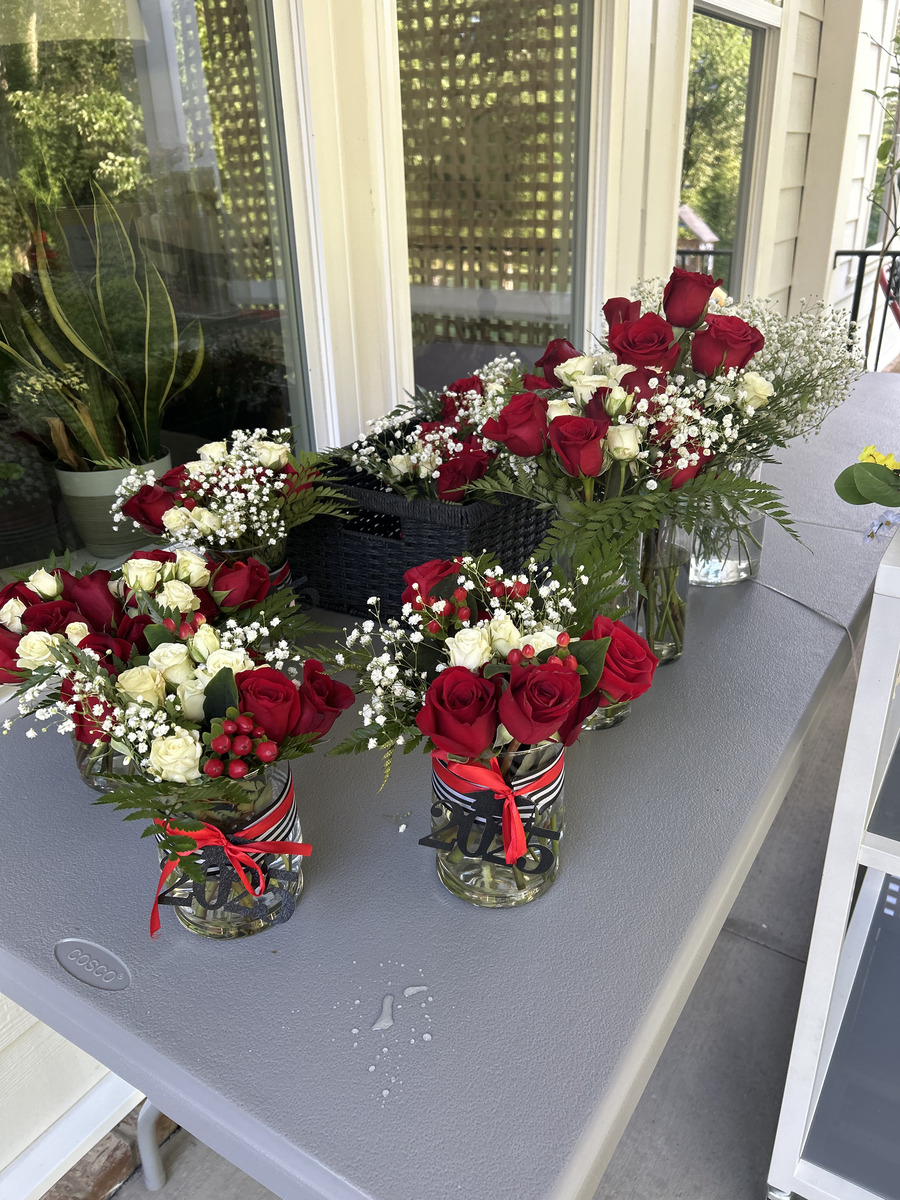
I made eight arrangements in about 45 minutes the morning of. Total spend: around $85 for all eight. Guests took them home at the end of the night, which I loved.
5. Signage that does the talking for you
Good signage is the secret weapon of a DIY party. It means you aren't standing at the lemonade station for three hours explaining syrups. I made everything in Canva, printed on cardstock, and dropped them into cheap acrylic sign holders (about $2 each on Amazon, and you'll reuse them for every party forever).
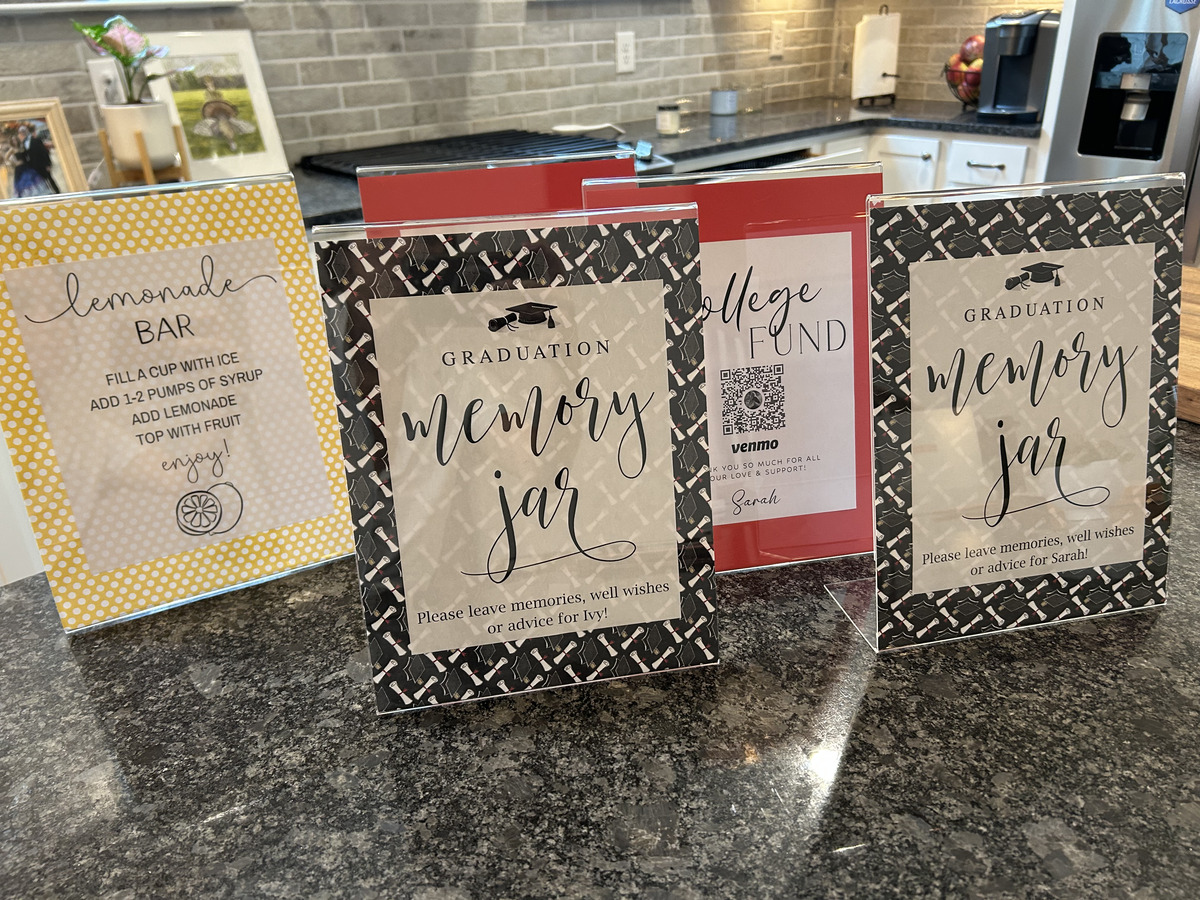
The signs I'd recommend for any graduation party
- Welcome / "Congrats [Name]!" sign at the entrance
- Memory jar sign with instructions ("Leave a memory, well wish, or piece of advice")
- Lemonade bar / drink station with self-serve instructions
- College fund Venmo QR code — print your grad's Venmo QR and a warm thank-you note. This is a relatively new graduation party tradition and it is fantastic for out-of-town family who don't want to carry a card
- Food labels — small tented cards for each dish, especially for allergen callouts
Pro tip: use the same two fonts across every sign. One serif, one script. Don't overthink it.
6. The lemonade bar (easiest station to set up, biggest hit with the kids)
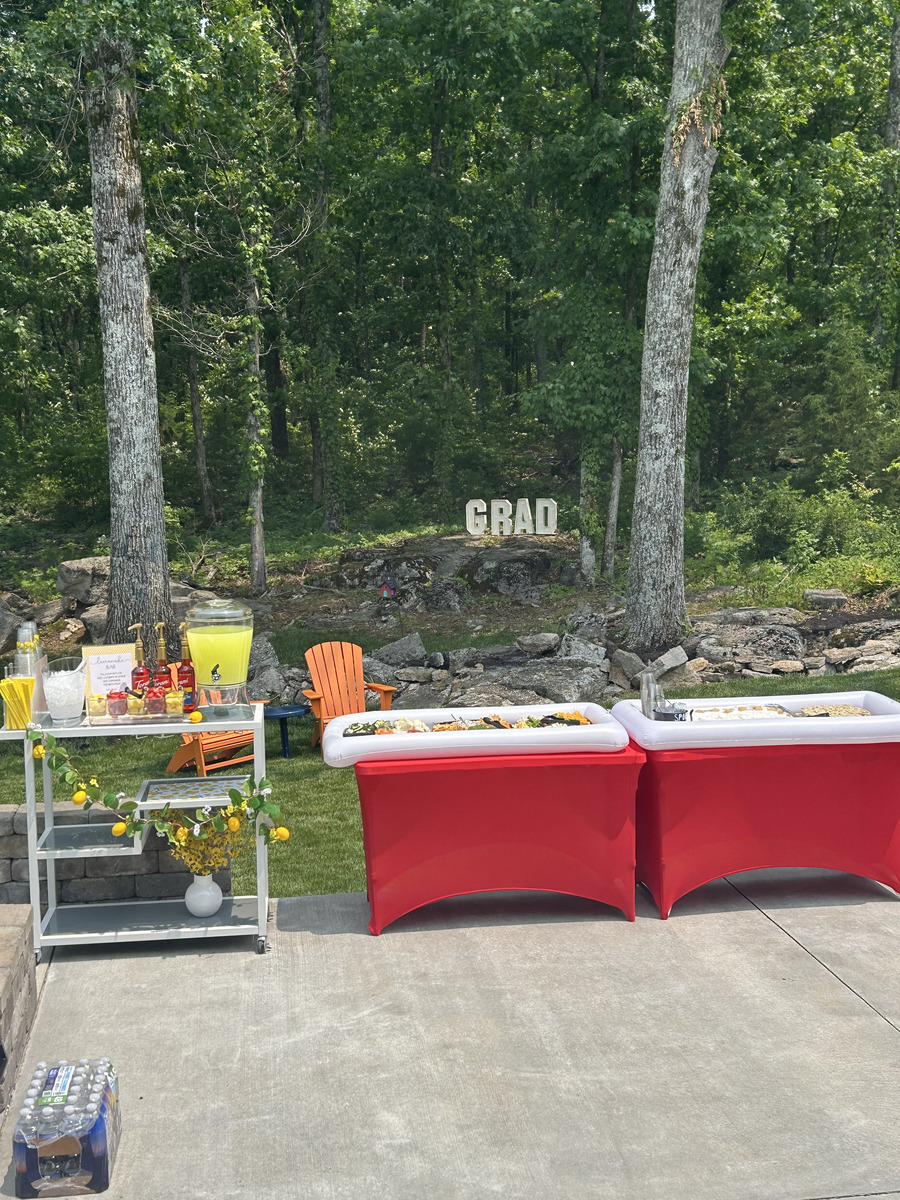
I set this up on a rolling bar cart with:
- A 2-gallon drink dispenser of plain lemonade
- Four small pumper bottles of flavored syrup (strawberry, raspberry, peach, blackberry — grab them in the coffee syrup aisle)
- Fresh fruit cups for garnish
- Mason jar drinking cups with striped paper straws
- A bucket of ice
The instructions on the sign are three steps: ice → 1–2 pumps of syrup → lemonade → top with fruit. The teenagers loved building their own.
7. Feeding a crowd without a caterer
We did sandwiches, pasta salad, a cheese board, and a taco bar for the main spread. But the sleeper hit of the food logistics was using inflatable pool-style serving troughs covered with spandex tablecloths. You blow them up, fill them with ice, and they keep everything from salads to charcuterie cold for hours outside in May humidity.
They cost about $10 each, they pack down flat to reuse, and they look dramatically better than a sad tinfoil pan with bagged ice.
8. The dessert table (let the school mascot do the work)
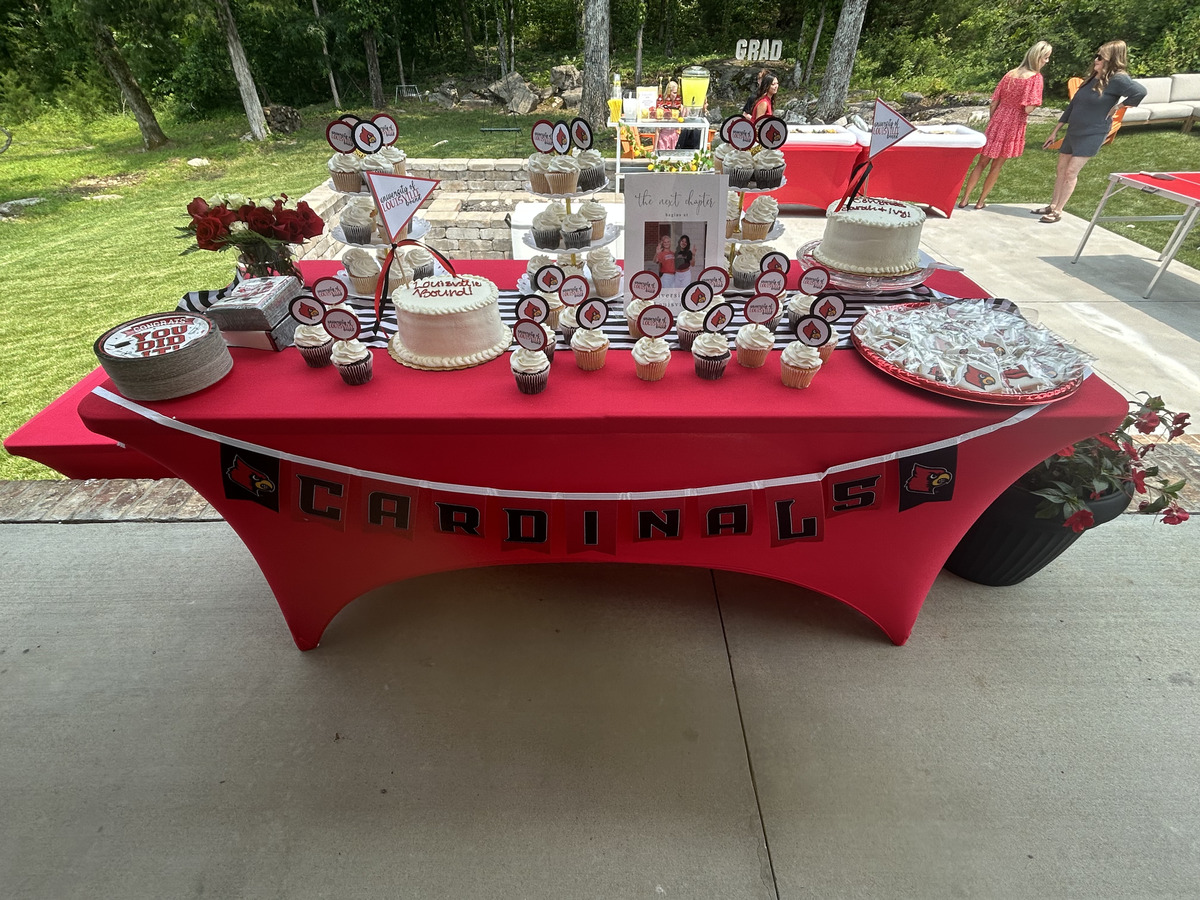
I hired exactly zero custom bakers. Here's what made our dessert table look like it came from one:
- Grocery store cakes and cupcakes. Plain white buttercream. Zero inscription on the cupcakes.
- Custom toppers printed at home on cardstock, glued to craft sticks — one featured the Louisville Cardinals mascot, another said "Memories Await." Free Cricut templates exist for literally every mascot.
- A team banner ("CARDINALS") from the college bookstore, draped as a table skirt embellishment.
- A framed "Next Chapter" photo of Sarah and Ivy as the centerpiece.
- One main cake piped with "Louisville Bound!" in red (order from the grocery store bakery for about $35).
Under $150 total for dessert, and it looked styled.
9. The photo booth (the thing everyone actually uses)
I stretched a clean white flat sheet between two Command-hook anchors on the pergola and framed the top with a half-arch of balloons. That was the whole setup. Total cost: $0 (I already owned the sheet) plus the balloons I'd already bought for the garland.
Put out a few props (graduation cap, boa, "Class of 2025" sunglasses from Amazon for $14) and you will be stunned how many Instagram stories tag your house that night.
10. One more DIY I'm glad we did: a photo collage reveal
The night before the party, the girls sat in the kitchen and assembled giant photo collage boards of their favorite moments together and with each of their friend groups. We used oversized foam core and rubber cement. It was a whole vibe — snacks, music, crying, laughing. Honestly it might have been my favorite part of the weekend.
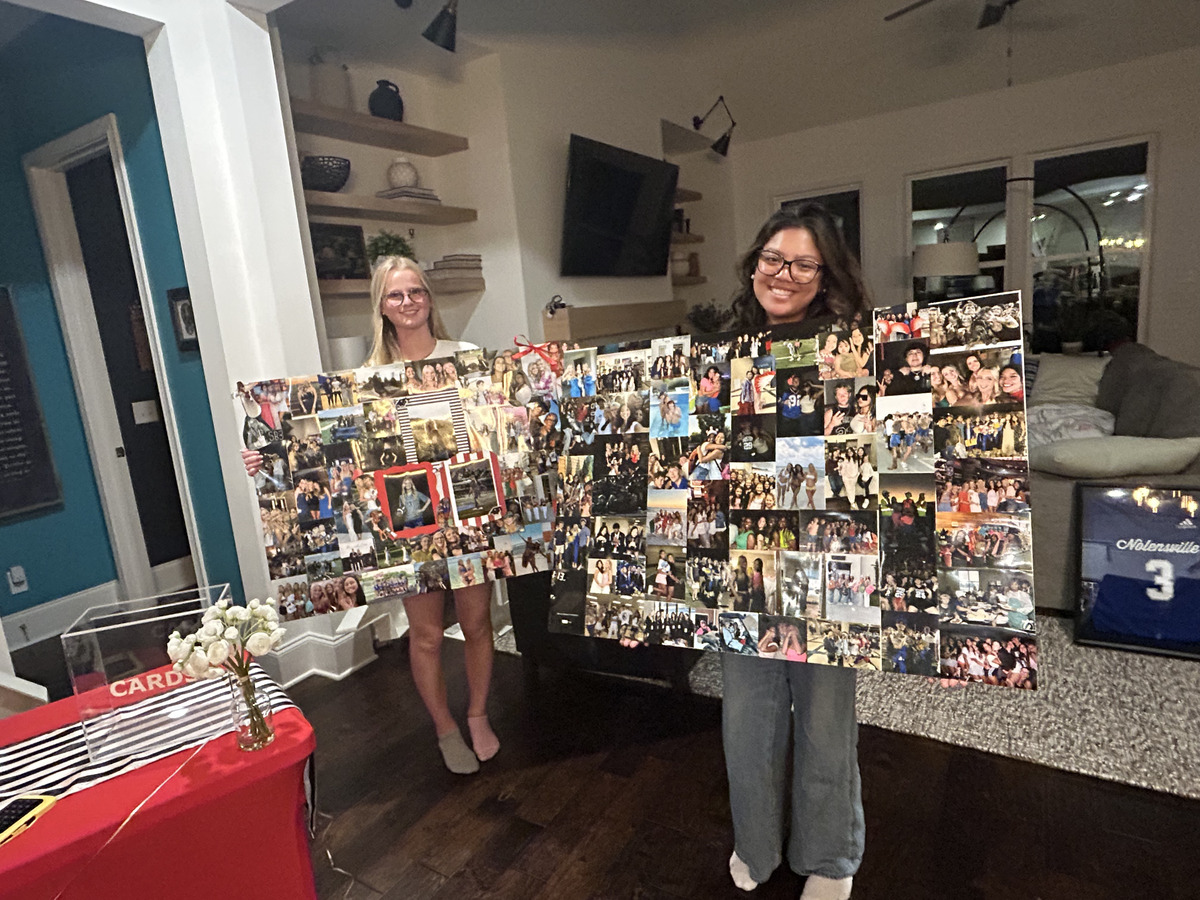
If you do nothing else on this list, do this one. It's a memory in itself, and those boards end up going with them to college.
11. The "GRAD" marquee and finishing touches
Big light-up GRAD letters set into the tree line became the unofficial photo spot of the party. Ours are the battery-operated kind from Amazon (about $50 for the set of four) and they're reusable for every senior in the house going forward — which, in our case, is another one next year.
Other small touches that pulled the whole thing together:
- Red Adirondack chairs in the yard for seating
- Lemon topiaries on the bar cart (dollar store lemons + a vase + faux greenery)
- A "cards" acrylic box tied with striped ribbon
- A photo-banner clothesline of both girls' yearbook pictures strung across the tablecloth
What I'd do again (and what I wouldn't)
Would absolutely do again
- The lattice photo boards. Hands-down the MVP.
- The mason jar centerpieces as guest takeaways.
- The college fund Venmo QR code — a grandparent two states away sent $100 while still at the buffet line.
- The collage-making the night before. Worth every minute.
Would adjust next time
- Inflate the balloon garland across two nights, not one. My hands were still sore Monday.
- Order the chipboard letters a week earlier than you think you need them.
- Accept help. When your neighbor texts "want me to come cut sandwiches?" — the answer is yes.
Quick-reference DIY budget
For anyone in the middle of planning their own — here's the short version:
| Balloon arch kit + balloons (Amazon) | ~$55 |
| Two 4x6 lattice panels + clothespins + chipboard letters (Home Depot + craft store) | ~$65 |
| Mason jars (8) + grocery store flowers + ribbon + 2025 tags | ~$85 |
| Acrylic sign holders (8) + cardstock (Amazon; Canva templates are free) | ~$25 |
| Inflatable serving troughs × 2 (Amazon) | ~$20 |
| GRAD marquee letters (Amazon) | ~$50 |
| Drink dispenser + syrups + mason cups + straws (Amazon) | ~$45 |
| Spandex tablecloths & table runners (Amazon) | ~$75 |
| Tables & chairs — local party rental | ~$200 |
| Total decor, linens & rentals | Around $620 |
All in, around $620 for decor, linens, and the tables and chairs — the kind of setup that made people ask who we hired. Nobody we hired. Just a stubborn stepmom, a very patient husband, and an Amazon cart that knew too much.